How to change DNS on Fire TV stick
Using a VPN is the easiest and most effective way of spoofing your location on an Amazon Fire TV Stick (aka Firestick, but this also includes all Fire TV devices).
For more information on using a VPN on the Firestick, please see Best VPN for Fire Stick.
How to change DNS on Fire TV Stick
It might be possible, however, to evade geographic restrictions on content, or even avoid throttling by your ISP, by changing the DNS settings of your Fire Stick.
Note you do not need to do this if using a VPN, as DNS requests are sent through the VPN tunnel to be handled by your VPN provider.
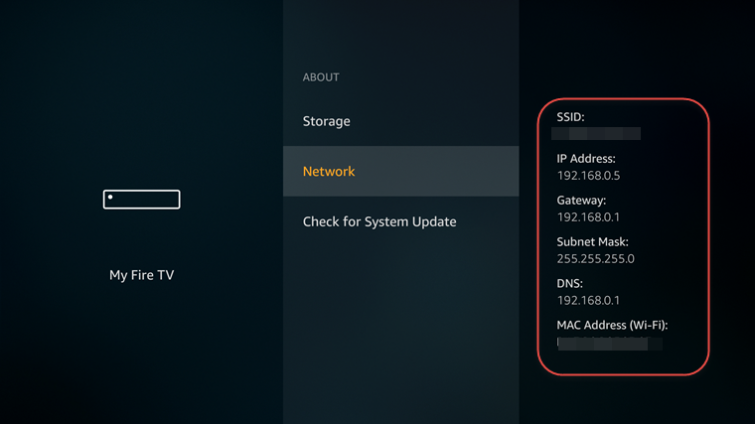
- Go to Settings -> My Fire TV -> About -> Network and make a note of all the settings there (taking a photo with your phone is an easy way to do this).

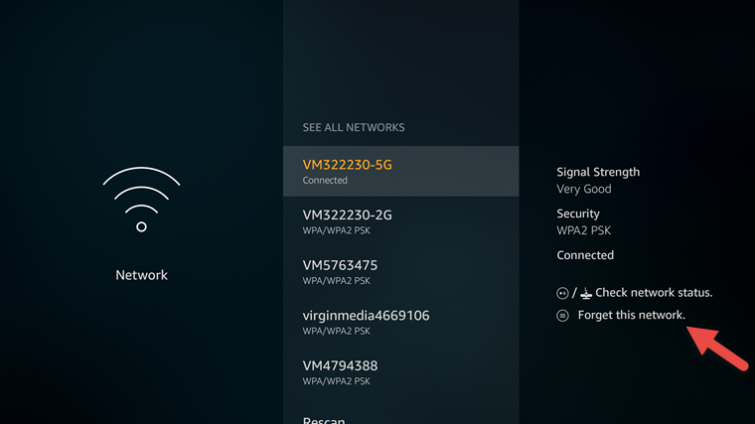
- Go to Settings -> Network and select your Wi-Fi network. Click the remote’s menu button (☰) to forget this network.
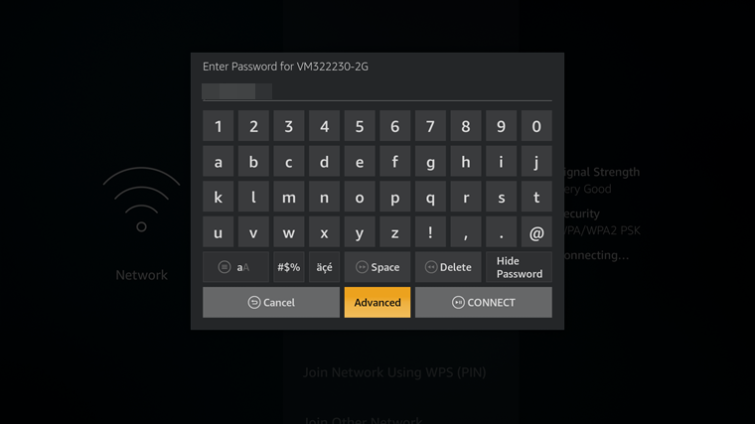
- Click on the connection again and enter your network password (SSID). Instead of clicking Connect, click Advanced.
- Enter the “IP address“…
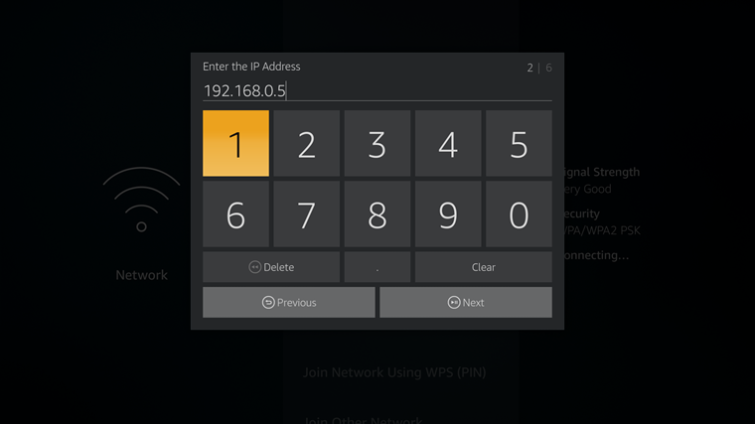
- … and “Gateway” values you noted in step 1.
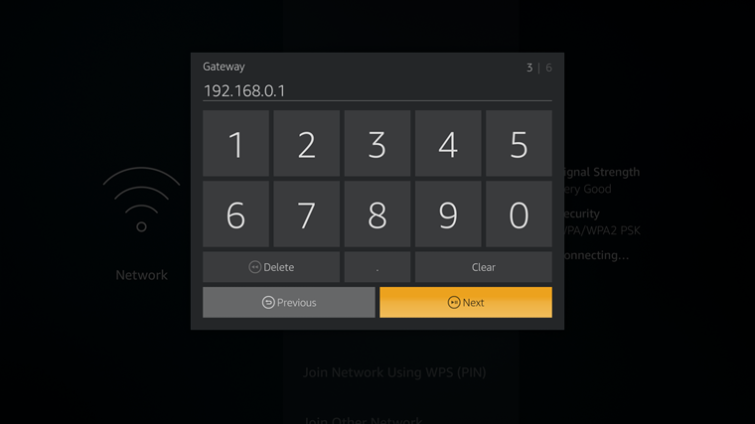
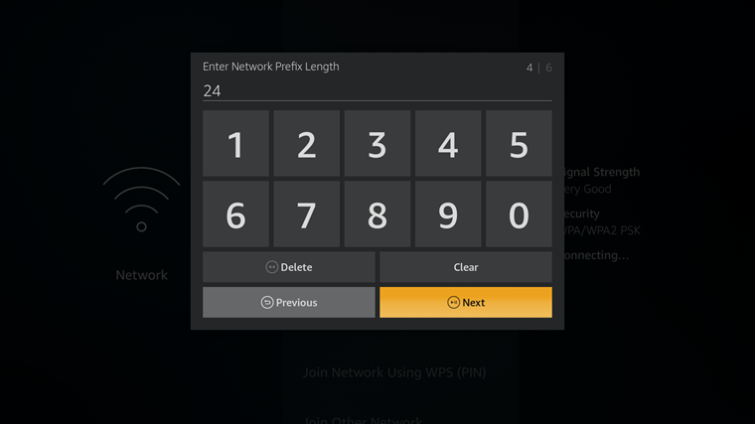
- For Subnet Mask there can be a few options: enter 24 if the Subnet Mask value you noted in Step 1 was 255.255.255.0, or 32 if the “Subnet Mask” value was 255.255.255.255. For any other Subnet Mask values, use this tool to calculate the number. The value listed after Mask Bits is the one you are looking for.
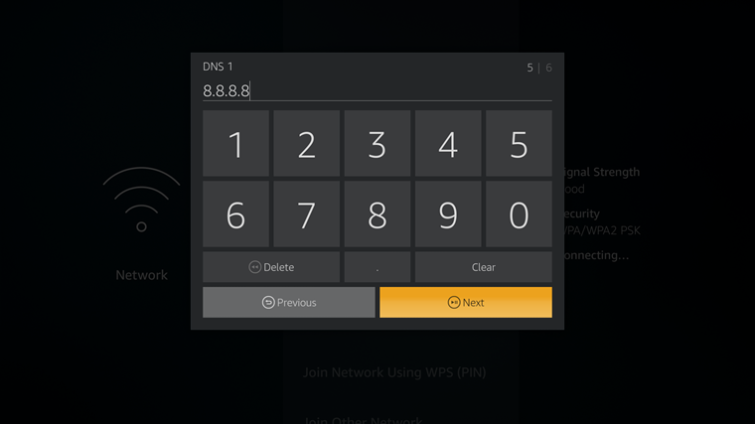
- Enter the primary (DNS 1) and secondary (DNS 2) DNS settings.
How to verify the DNS changes is working
Once you have changed your DNS settings, you might want to check that the change is working. To do this, download the Firefox for Fire TV browser and visit ipleak.net. You should see your new DNS server settings under “DNS Address detection”.
But what DNS setting should I enter?
If you use a commercial smart DNS service, it will tell you what DNS settings to use. If you want to use a public DNS service, then see A Complete Guide to Changing your DNS Settings for a discussion on your options.
[[post-object type=”useful-articles” ids=”9317,8197,9119,9223,8137″ title=”Useful Firestick Guides”/]]
Use a SmartDNS on your Firestick to unblock content
As previously mentioned, a VPN is the best way to alter your DNS settings because a VPN automatically redirects your DNS requests so that they are handled by a VPN server in your preferred location. This provides you with high levels of privacy.
Being able to change your DNS settings on a Firestick without needing to connect to a VPN can be extremely useful, and some VPN providers understand this.
Using Smart DNS allows you to alter the location of your Firestick device, without needing to install a VPN onto it, which inevitably uses up space and internal memory. It also allows you to do location spoofing without needing to install a VPN onto your router, or by sharing your internet connection from the firestick to a VPN-enabled device.
That is why ExpressVPN has opted to include a smart DNS service called MediaStreamer for free with every subscription. MediaStreamer is available via the member’s area of its website; where it provides you with the DNS address you need to enter the menu on your Firestick (using the instructions above).
For the price of a subscription with ExpressVPN, you get full use of a VPN on up to 5 devices and access to its MediaStreamer. This allows you to get complete privacy online and the ability to unblock international services like Netflix (it unblocks 24 international Netflix catalogs in total) in addition to a Smart DNS service.
Try it for yourself!
Click the button below to give ExpressVPN a test risk-free, and take advantage of its no-quibbles 30-day money-back guarantee.
[[post-object type=”gotolink” provider=”expressvpn” class=”btn btn-lg btn-primary”]]Visit ExpressVPN[[/post-object]]
Image credit: By Steve Heap/Shutterstock.


